With Google Calendar Two-Way sync in BMA, all employees of your business can sync their working schedule with their google-calendar. Every appointment is booked in the system that assigns a particular employee as the provider adds an event to their google calendar.
In this article, we will take a look at how to set up Google Calendar Sync in Book My Appointment.
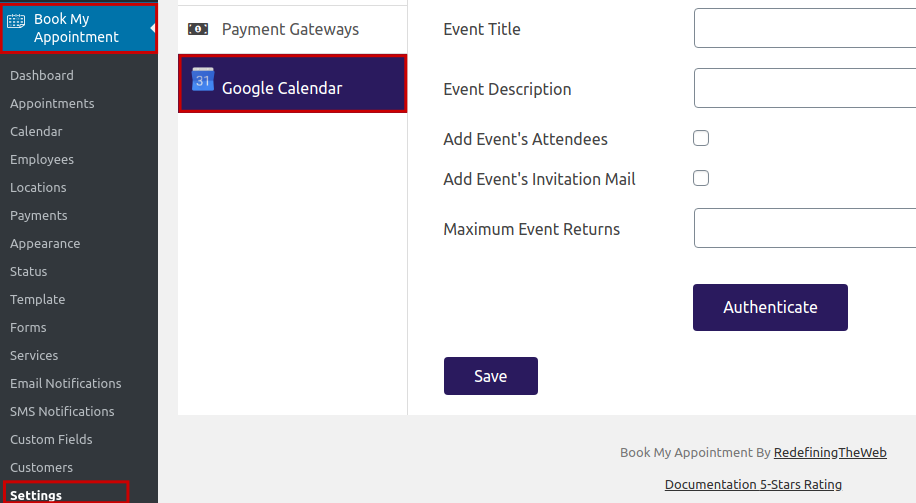
To start we first have to navigate to Settings under the Book My Appointment menu. And then move to the “Google Calendar” tab.
Here the most important fields are the Client ID && Client Secret. To Generate these follow the following steps:
1. Go to your Google Developers Console
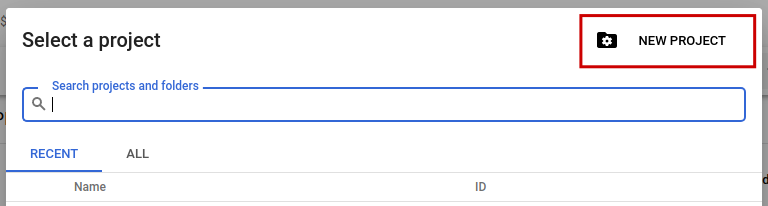
2. Click on “Select a project”, or if you have some other projects active, simply click on the drop-down to create a new project.
3. In a new window that appears, click on “NEW PROJECT” in the top right
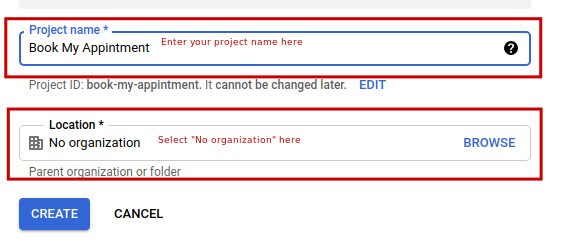
4. Enter the project name, select “No organization” and click on “CREATE”
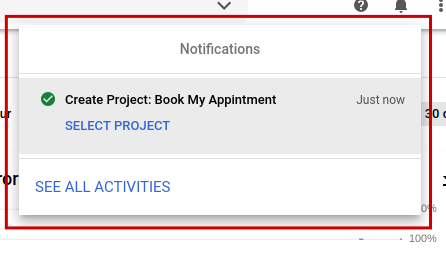
5. You will see the project is being created in the top right, and once it is created you will get a notification stating “Create Project: Book My Appointment” with a button saying “SELECT PROJECT”.
6. Click on this button this will select the newly created project and take you to the project’s Dashboard.

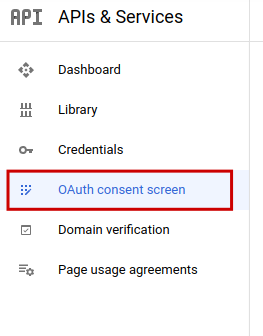
7. Now click on the “OAuth consent screen”.
8. The first step in the OAuth consent screen is to select the User Type. Since your employees will be registering with their own Gmail accounts, you need to select “External”, and click on “Create”.

9. Now a new window will open where you need to type “App name” and choose the “User support email”. This email will be the email of the Google account you’re logged in with, so just select it from the drop-down.
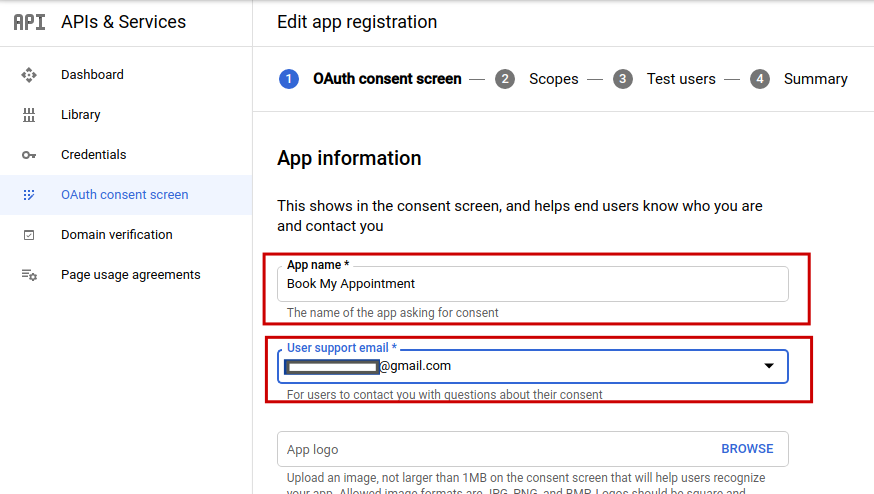
The “App name” can be your company name or anything you like. These details will be showed on the Google consent screen when asking for permission.
10. Then, you need to enter your domain under the “Authorized domains” section and add your email in the “Developer contact information” field. After adding this, click on “Save and continue”.

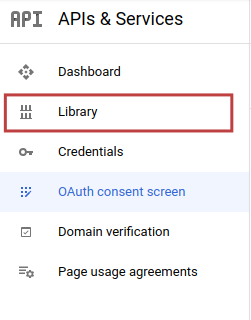
11. This will take you to the second step in the “OAuth consent screen”, but you can skip all that. Now click on the Library option in the side menu.
12. This will redirect you to the API Library screen, there search for the “Google Calendar”
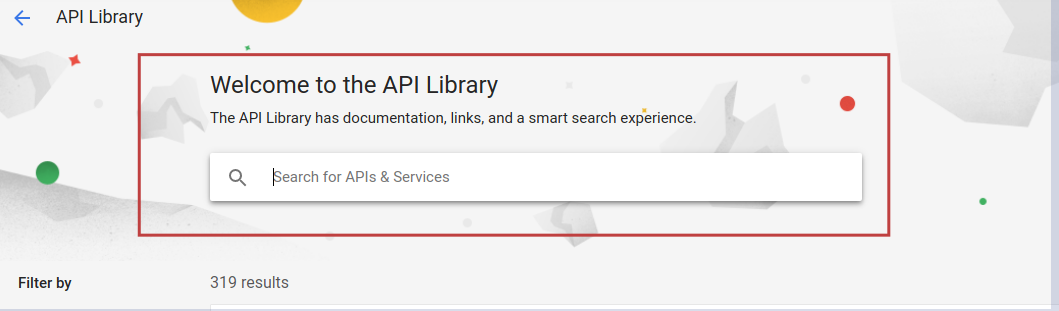
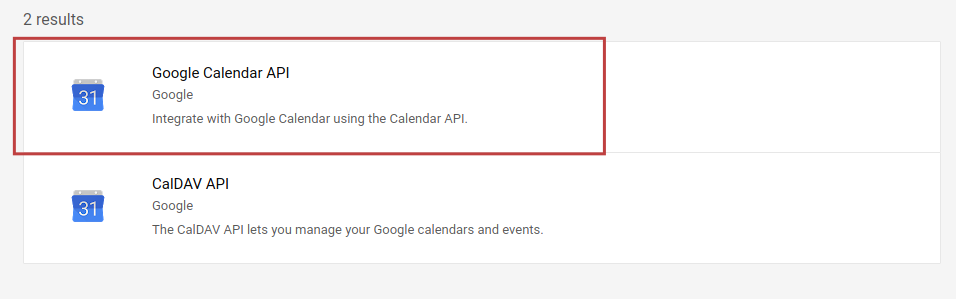
13. As you type you will see the results. Click on “Google Calendar API“
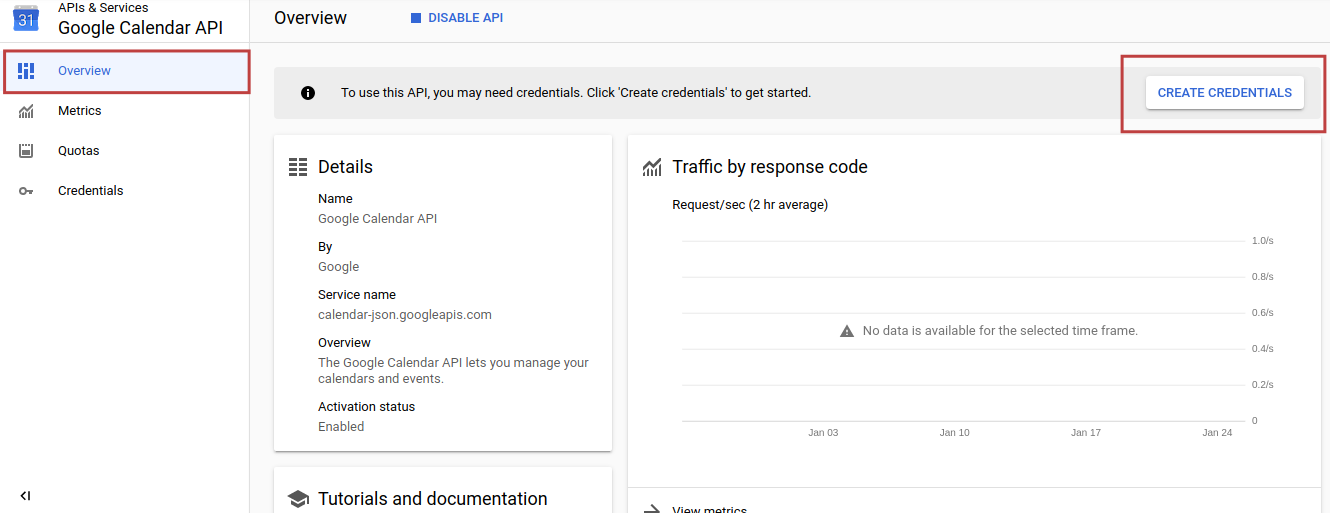
14. Click on the Enable button:
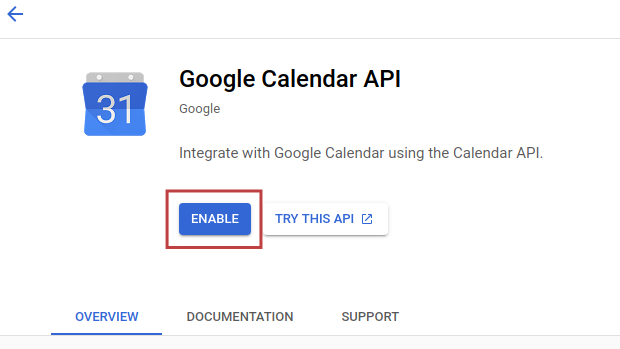
15. When the API is enabled, you will see its “Overview” screen. Click on the “Create Credentials“ button on the far right.
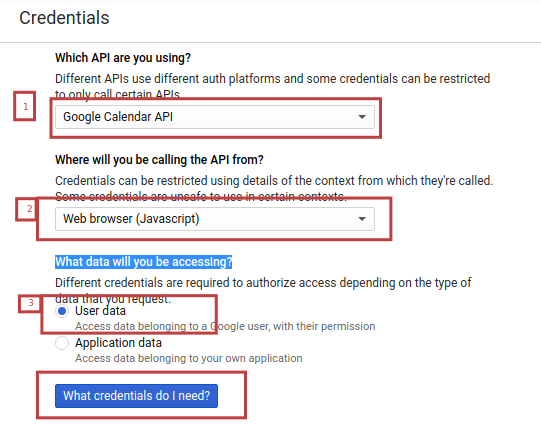
16. This will open the “Credentials” window. There you need to select:
1) “Google Calendar API” in Which API you are using?
2) “Web browser (Javascript)” in Where will you be calling the API from?
3) “User Data” in What data will you be accessing?
Then click on the “What credentials do I need?” button.
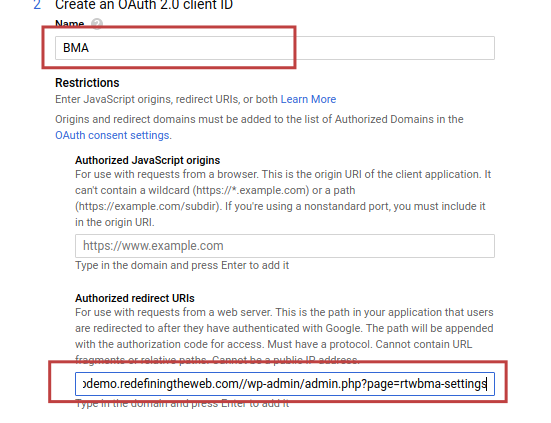
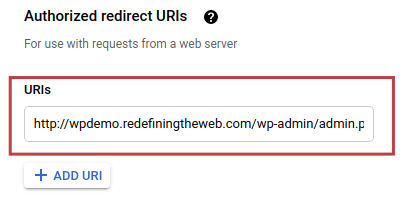
17. At the second step, give the “Name” of your OAuth client ID, and in the “Authorized redirect URIs” field, enter the URL from the “Redirect URI” field. You can find the “Redirect URL” field in “Google Calendar Settings” on the BMA Settings page. After that click on the “Create OAuth client ID” button.
After the client ID is generated click on the “Done” button.
18. As you do it you will be redirected to the “Credentials”
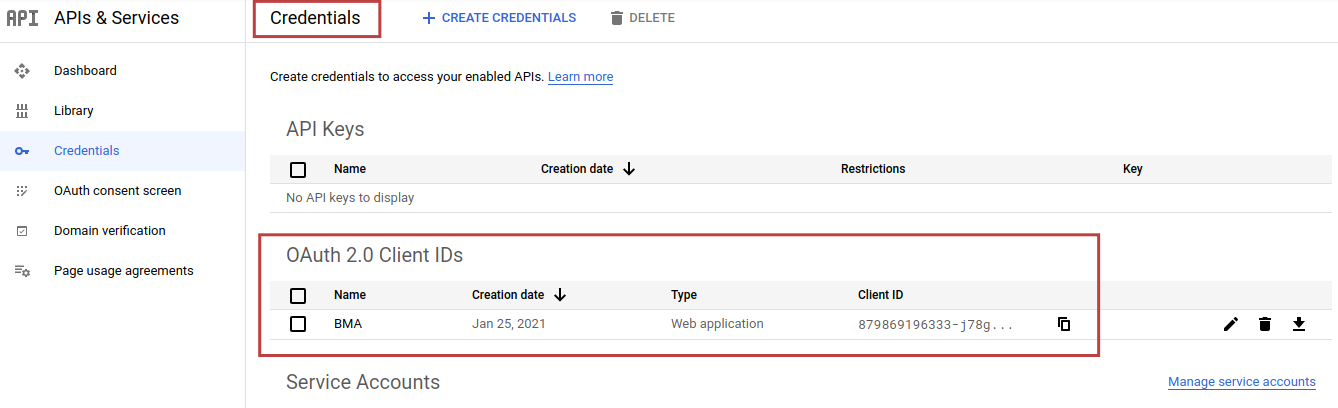
19. Click on the edit button the generated Client under “OAuth 2.0 Client IDs”:

20. When you access the generated client ID please ensure that the “Authorized redirect URIs” is present if not please add it again from the BMA settings.
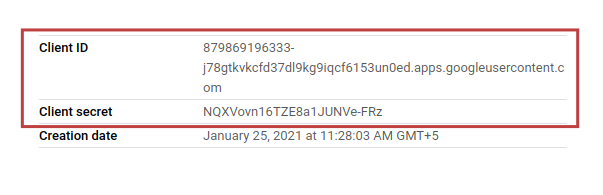
21. Copy and paste “Client ID” and “Client Secret” into related fields in Book My Appointment Settings.
22. After that navigate to the “OAuth consent screen” again and click the “Publish App” button and then “CONFIRM” the dialogue.

And you are done with generating the Client ID and Client Secret.
Now just add the “Event Title” & “Event Description” for the event that is created on the calendar.
Then just select if you want “Add Event’s Attendees” and “Add Event’s Invitation Mail”
After that hit the Authenticate your credentials. Once the credentials are successfully authenticated hit the “Save” button.
And there you have it. The Setup for Google Calendar for BMA is complete.