Are you looking for WooCommerce FreshBooks integration into your online store? We can help. With so many WooCommerce FreshBook integration plugins for WordPress-powered websites, it can be overwhelming to find the best suit for your e-commerce store. For this reason, we have developed a highly functional and intuitive module that makes FreshBooks integration into your online store business a breeze. In this article, we have provided a step-by-step guide to help you set up WooCommerce Freshbooks Integration plugin on your online store.
What is WooCommerce Freshbooks Integration?
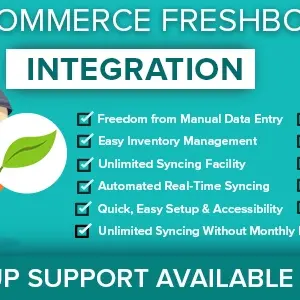
As we all know, Freshbooks is a premium cloud-based accounting management software for enterprises and eCommerce businesses. If you are already using Freshbooks to manage your business accounts, it is now possible to use the platform for your eCommerce accounts management too. WooCommerce Freshbooks Integration is a highly functional extension that allows you to sync FreshBooks new to your WooCommerce store in a few seconds. Not only this, the two-way automated integration system allows data transfer to and from your online store to Freshbooks and vice versa.
Step-by-Step to Set Up WooCommerce FreshBooks Integration
Assuming that you have not yet configured FreshBooks on your WooCommerce website, herein is a comprehensive guide to getting started from scratch:
Step 1: Configure FreshBooks on Your WooCommerce Store
This is very easy.
- Login to your FreshBooks account
- Visit the link: https://my.freshbooks.com/#/developer
- On the developer’s page, click the green button titled ‘Create an App’*
- On the ‘Create Application’ page, enter the App name (without using any white spaces), Website URL (enter your WooCommerce store URL), Redirect URL (copy the redirect URL link from the Authentication section of WFI plugin) and click the ‘Save’ button
- Copy the Client ID and Client Secret Key from the FreshBooks Developer’s page
- Paste on Freshbooks Client ID and Client Secret Key at the Authentication section of WFI plugin. Now click the ‘Connect to Freshbooks’ button
- On the Freshbooks’ Developer’s page, click on the Authorization URL link
- Click the ‘Allow Access’ button on the new tab**
*This step will help you to get started with the Freshbooks API. **You will be redirected to the dashboard of the WFI plugin. It means, your done with the Freshbooks configuration on WooCommerce successfully.
Step 2: Add Users to FreshBooks
Depending on who needs access to account data, you can add users from WooCommerce to FreshBooks.
- Click the ‘Users’ menu on the WordPress dashboard
- From the list of users click on the checkbox of the specific users whom you want to connect to the Freshbooks account
- On the dropdown menu choose ‘Export to Freshbooks’
- Click the ‘Apply’ button on the top to complete the process
The concerned users should get their Freshbooks Ref ID after their profile is added.
Step 3: Step Up FreshBooks Account for Your WooCommerce Store
- Open WooCommerce Freshbooks Integration plugin dashboard
- Click on ‘Account Setup’ from the menu at the top
- Enter your company name to set up the business reference ID
- Click the ‘Save Changes’ button
Step 4: Configure Export and Import Settings
You can select the desired options for data export and import settings on the WFI plugin. Click the corresponding checkbox for the features that you want to enable on the plugin’s dashboard. To get started, open the ‘Basic Setup’ and configure the settings as required. After choosing the options, click the ‘Save Changes’ button.
Step 5: Configure Automation Settings
- Click the Automation Setup on the plugin menu
There are three options to enable or disable automatic data export to FreshBooks. If you enable all of them, the corresponding data will be automatically synced to your FreshBooks database. Option 1: ‘Enable Automated Customer Export & Update in FreshBooks’ If you enable Option 1, the database containing all existing customer profiles will be integrated into FreshBooks. The synced data will be automatically updated when a new customer registers an account or anyone edits the account details. Option 2: ‘ Enable Automated Product Export & Update in FreshBooks’ Enabling Option 2 allows Freshbooks to keep track of your product inventory, current stocks, etc. The data will be automatically updated when a product goes out of stock or a new product is uploaded to the site. Option 3: ‘Enable Automated Invoice Create & Update of an order in FreshBooks’ If you enable this feature in Option 3, the account information in FreshBooks will be automatically updated whenever an invoice is generated after receiving an order. Freshbooks will instantly receive the details of an order placed, generated invoice, etc. Once you are done, click ‘Save Changes’ button
Step 6: Configure Advanced Settings
Much similar to the other settings, you can visit this page from the ‘Advanced Setup’ menu on WFI plugin dashboard. There are different options on this page to allow you to add various forms of data to FreshBooks. Option 1: ‘Enable guest order’s customer creation on FreshBooks’ Enabling this option allows the plugin to export customer data to FreshBooks whenever a buyer chooses to place an order as a guest user (without creating a customer account). Option 2: ‘Enable to sync all expenses’ Enabling this option allows you to export the details of all expenses to FreshBooks including PayPal/Stripe fees. Option 3: ‘Enable to sync all expenses’ ‘Order status selection for Exporting Order’ This allows you to specify what type of order status data to export to your accounting software- ‘pending’, ‘canceled’, ‘on hold’, etc. Option 4: ‘Which action will perform on selected order status’ There is a dropdown menu for this option. This informs Freshbooks to assort the necessary action based on the order status such as ‘create invoice’. After you have setup all the options, click ‘Save Changes’ button.
Step 7: One-Click Import/Export
This is a time-saving feature on the WFI plugin. On this menu on the plugin dashboard, you will be able to import and export data to and from WooCommerce to FreshBooks on a controlled automated data sync system. Depending on your needs click on the desired button to sync the concerned data.
Step 8: Export Orders to Freshbooks Manually
WFI allows the admin to integrate store data to FreshBooks accounts either manually or over an automated system. For manual data syncing for orders, follow the steps below:
- On the WordPress menu on the left, click WooCommerce
- On the Orders page, select the orders from the list for which you want to export data to FreshBooks
- Choose Export to FreshBooks from the dropdown menu on the top
- Click ‘Apply’ tab
Step 9: Export Products Manually on FreshBooks
Much similar to the above step, visit WooCommerce.
- Go to ‘Products’ page on WooCommerce
- Select the product data that you want to export
- From the dropdown menu, choose ‘Export to Freshbooks’
- Click ‘Apply’ button
Wrap Up, To ensure a seamless operation when importing or exporting accounts data from WooCommerce to FreshBooks, you need to use a fully functional plugin. WooCommerce Freshbooks Integration plugin is the one-stop solution to all your accounts and data sync needs. Intuitive dashboard, accuracy, two-way sync, data transfer automation are some of the most promising attributes of this extension. It saves your time from the hassles of regular bulk manual data entry to the accounting software for further processing. Do you need assistance to sync Freshbooks to a WordPress or WooCommerce-powered website? Please feel free to get in touch and we shall do the needful at the earliest to help you with the plugin installation and configuration process.