Admin Dashboard
The appointment booking form is simple to understand for the clients with a clean look. It eases entering information in the fields quickly and complete the procedure in a few seconds. Once the client submits a booking it will automatically reach you for acceptance.
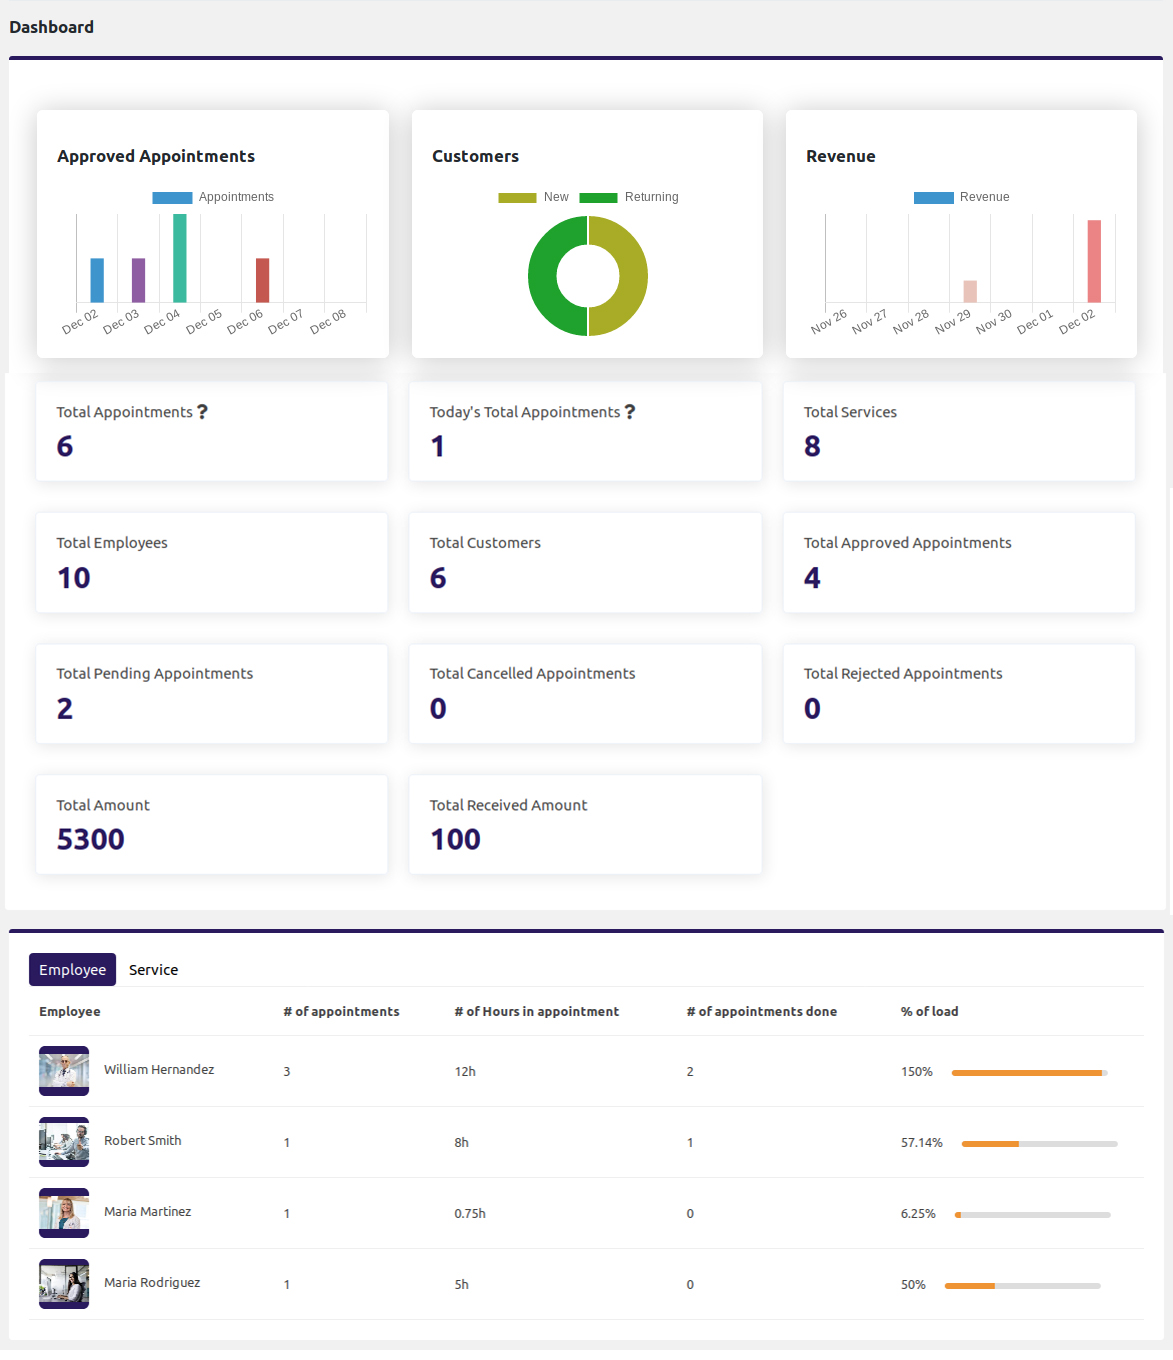
Everything can be seen on the admin dashboard as shown in the given image.
Appointments
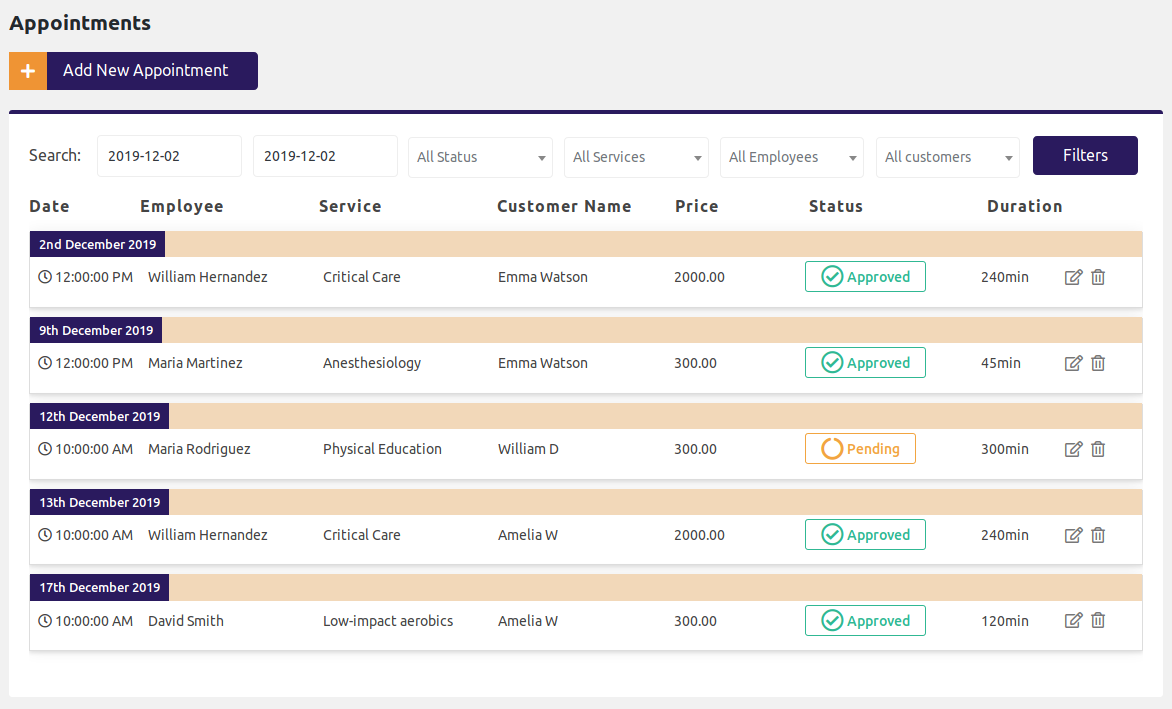
Once the client submits a booking it will automatically reach to the appointments table on the appointment page.
Calendar
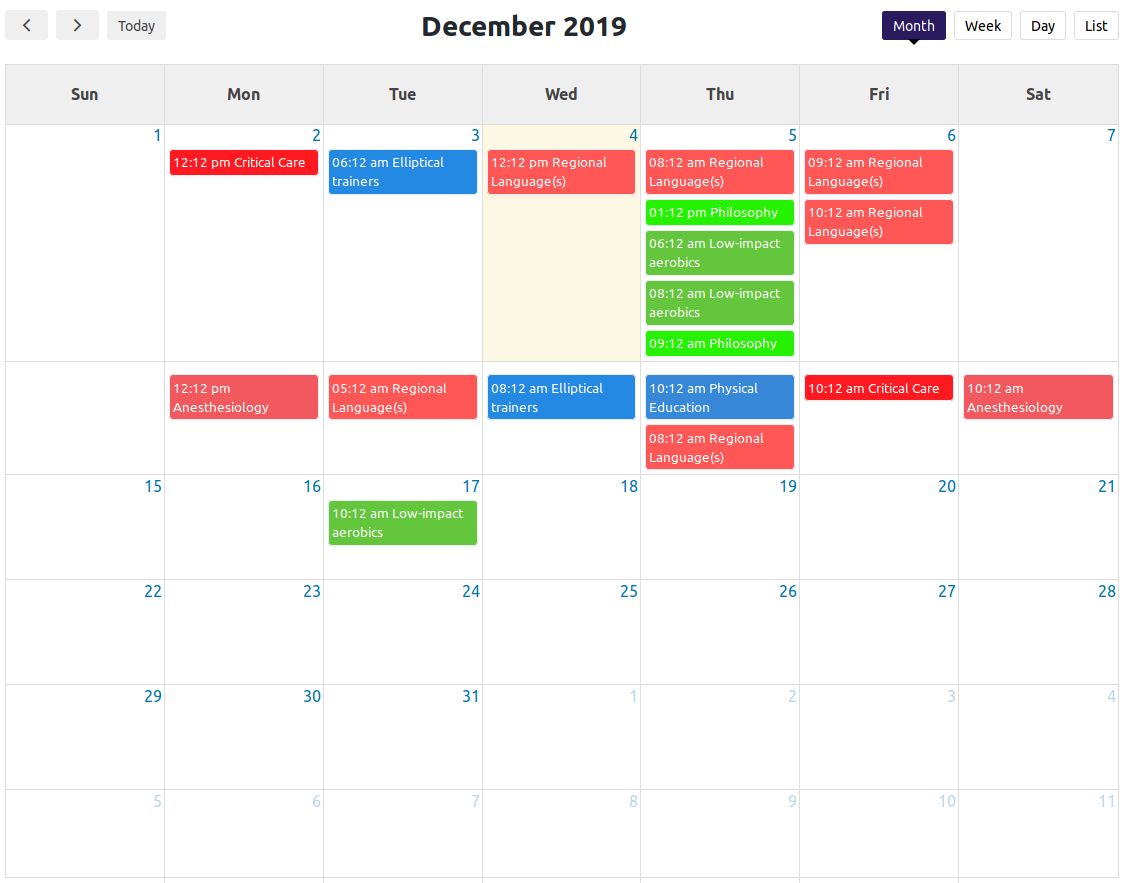
You can see as well as edit all appointments on the calendar.
Employees
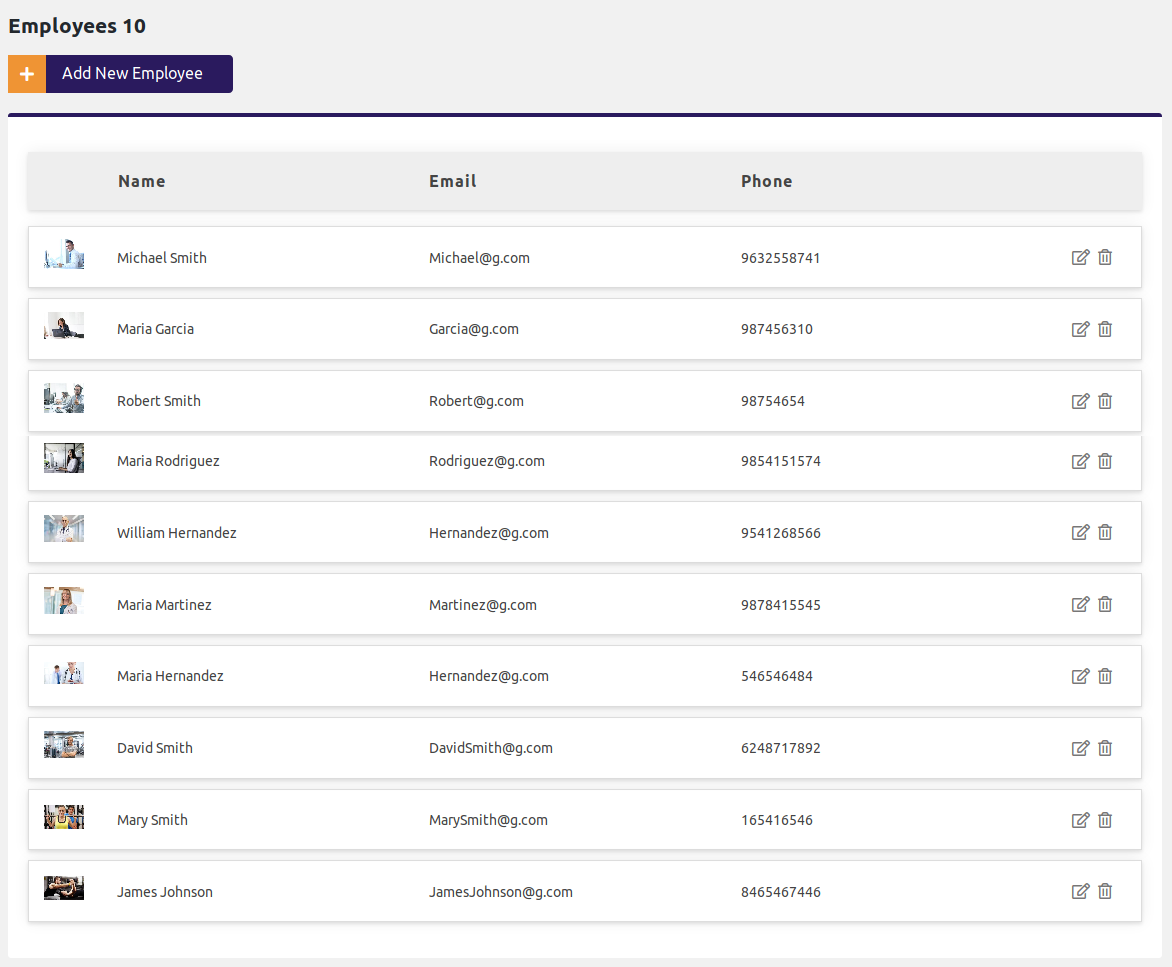
All employees can be seen here, admin can add as well as update all employee data.
Customers
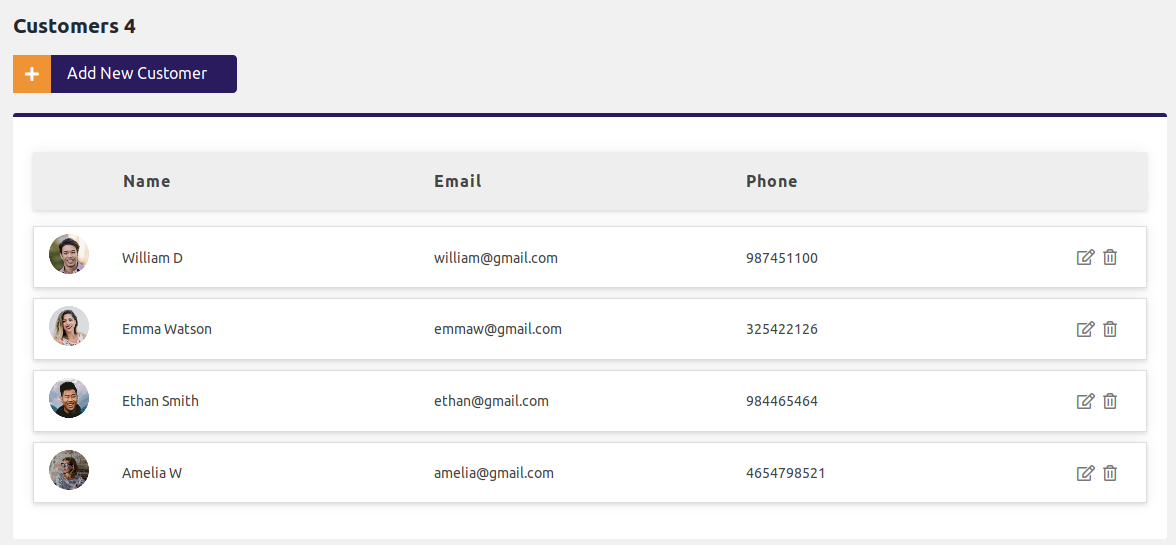
All customers can be seen on the customers page and their details can be editable by the admin.
Locations
Manage your locations for appointments here, you can add or update your service locations on this page.
Template Setting
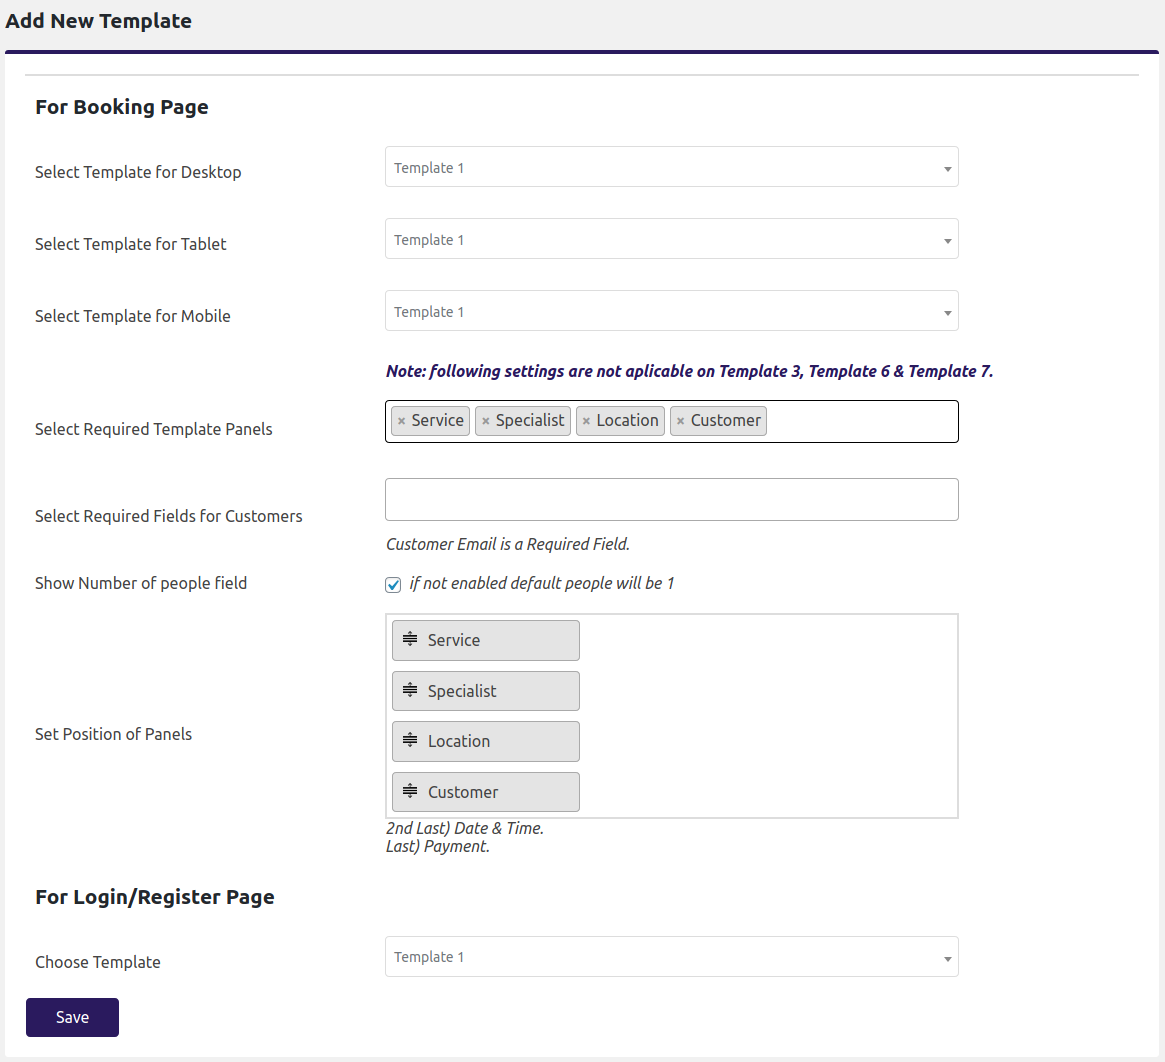
Choose a separate template for each device. You can select among 6 templates each template having a better view than the other.
Forms Setting
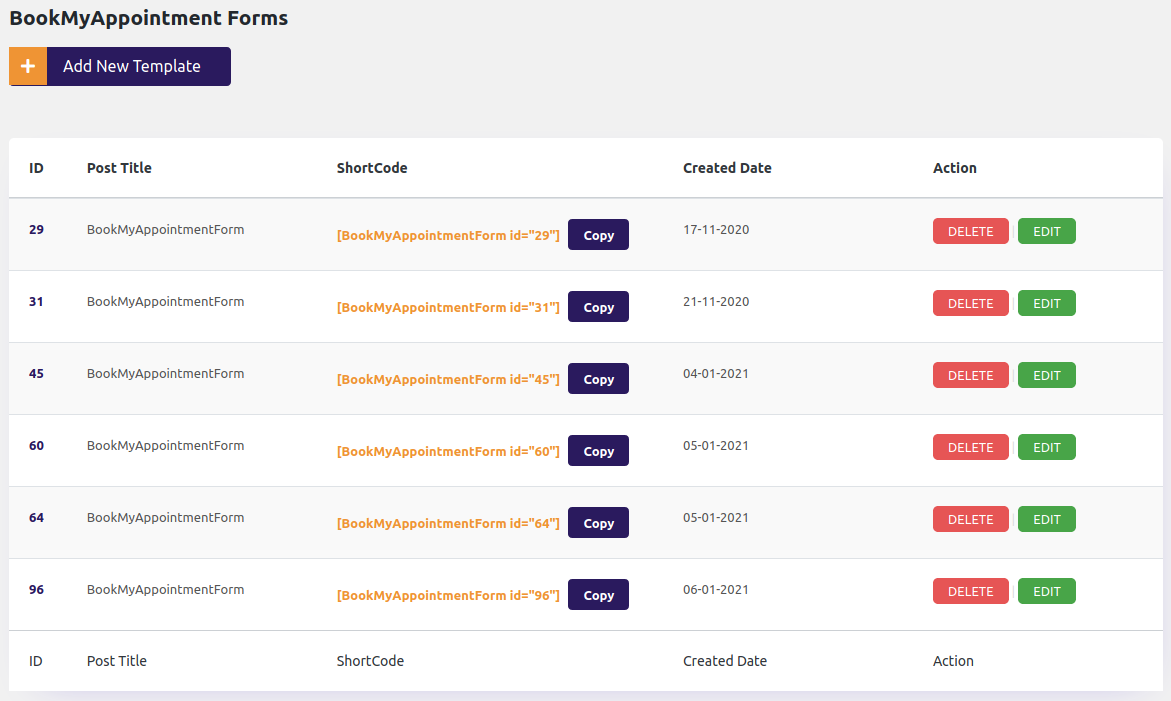
Now create as many shortcodes as you want. Each shortcode can be set according to your defined setting with the template number and panel’s position. You can edit or delete the shortcodes as your need.
Manage Service Page
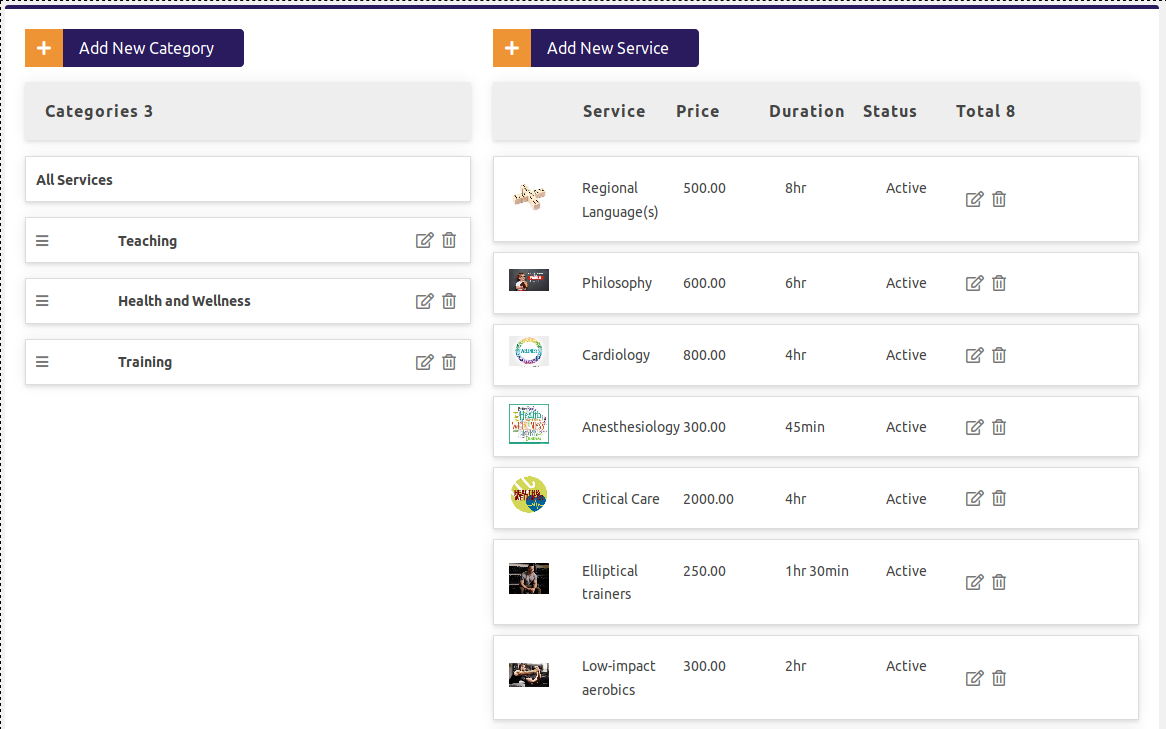
Make categories and services accordingly on this page. You can add update services as well as categories on this page.
Plugin Settings
Here is the General, Company, Payment, Business Hours, Holidays, SMS & Email Notifications and Payments method settings.
You can adjust everything from this setting page.
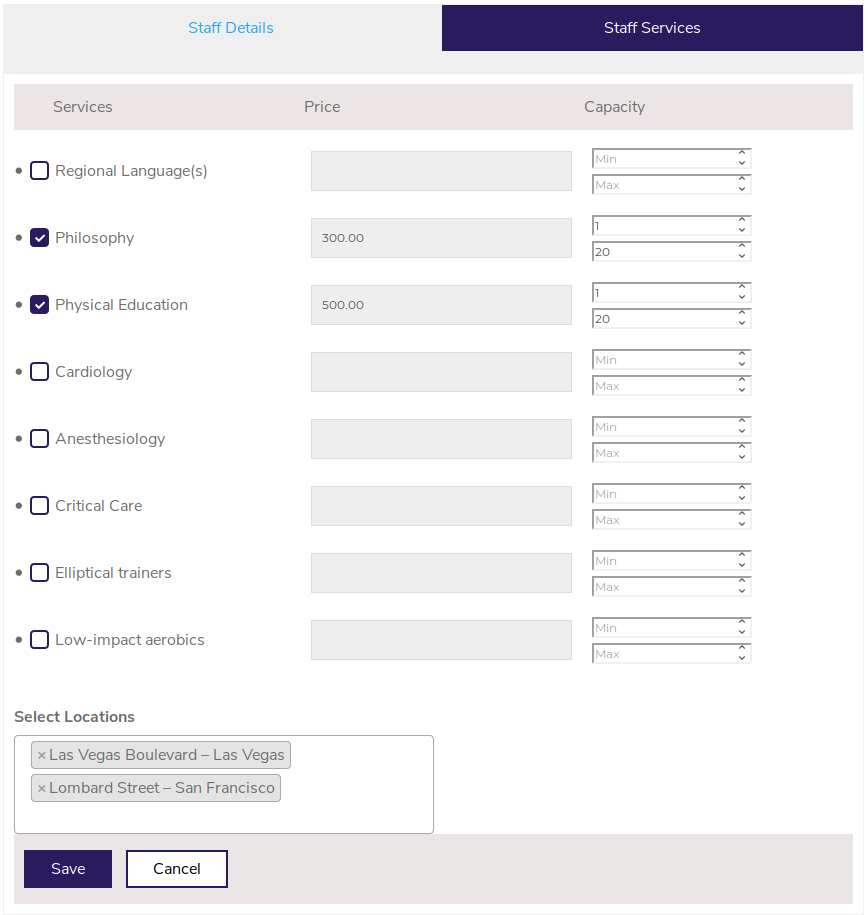
Employee Dashboard
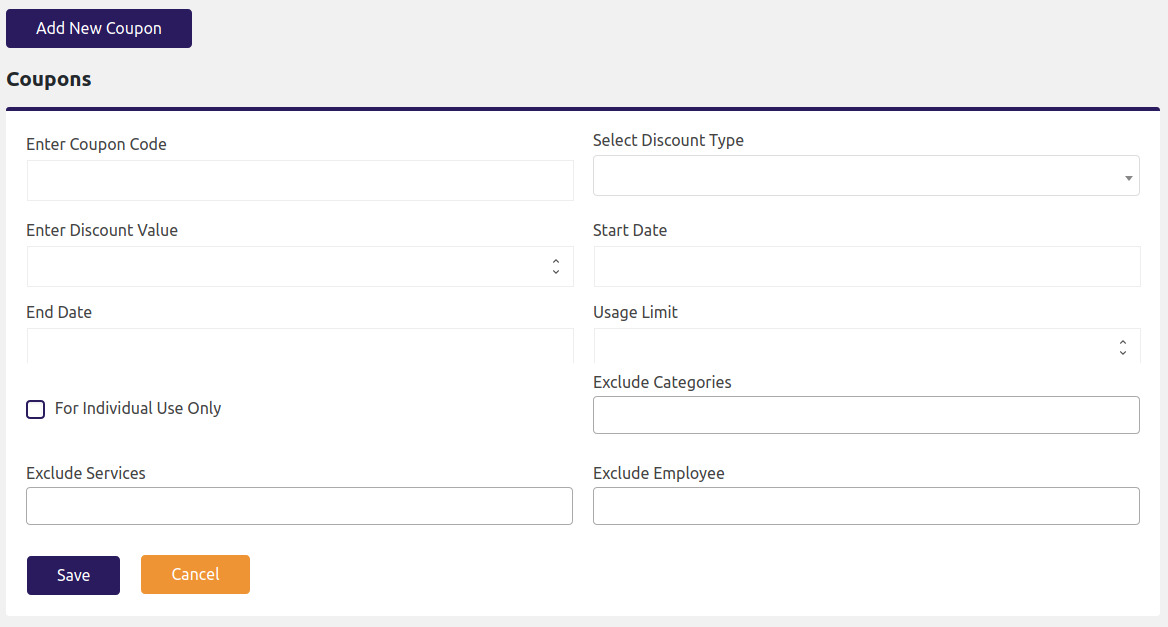
Coupon Module
Now admin can add coupons for his customers. As seen admin can create many restrictions to create his required coupon.
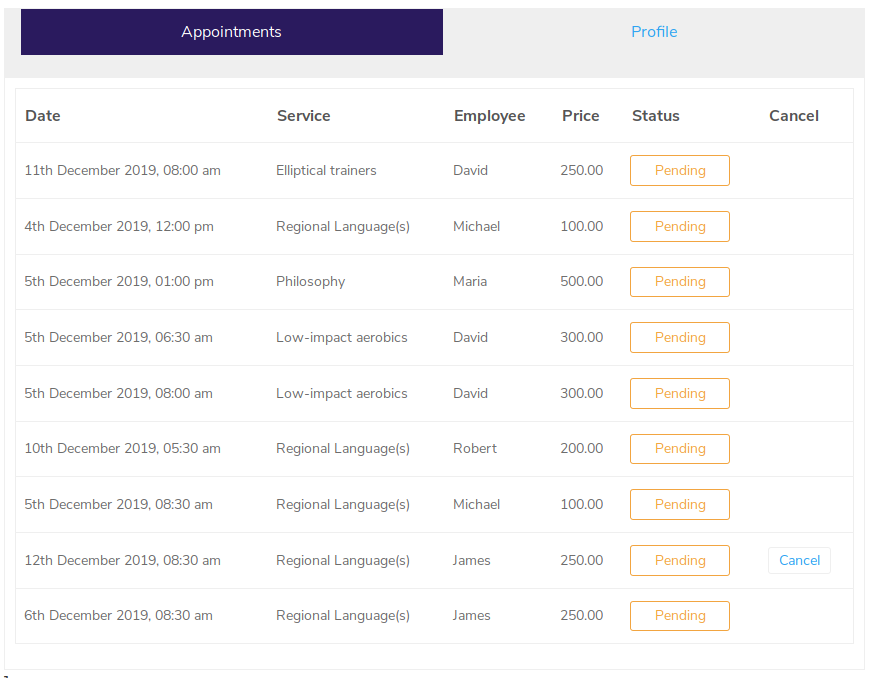
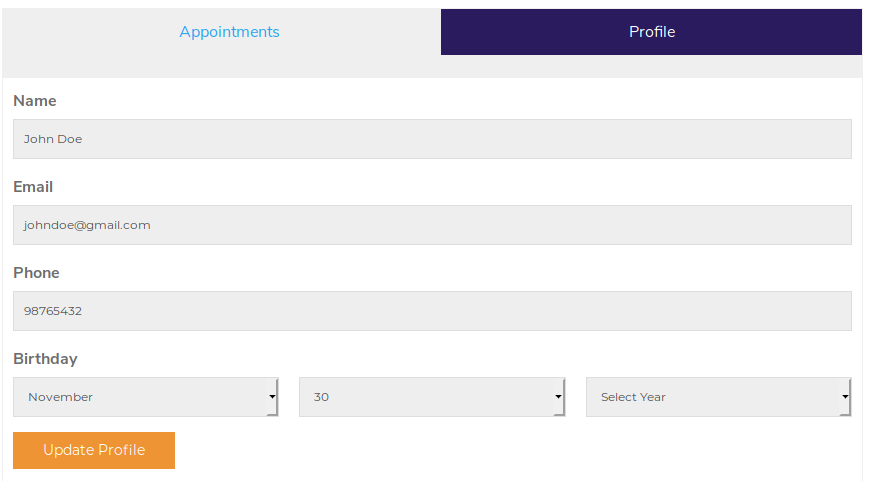
Customer Dashboard
Google Calendar Setting
Create Client ID & Client Secret
To integrate our plugin with Google Calendar you must have a Google client ID and client secret.
To create Google client ID and client secret go to Google Developer Console.
Click on add new project as shown in the figure.

Now enter the project name as you want and select no organization
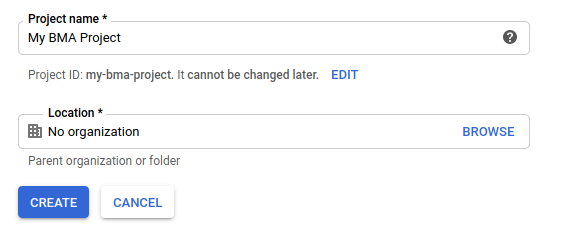
A notification can be seen on your screen after clicking on the create button. If you click on this notification, it will take you to the Project’s dashboard.

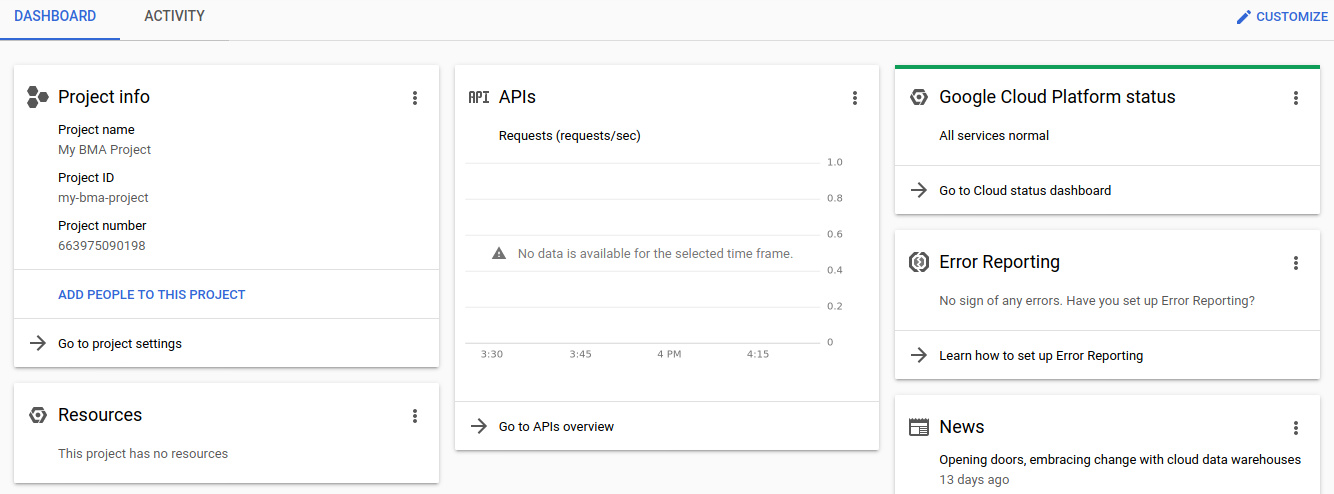
Go to APIs & Services and then select “OAuth consent screen”.
Now enter the Application Name and Authorize domain and then click on save button.
Click on the “Enable APIS and Services” link in the notification.

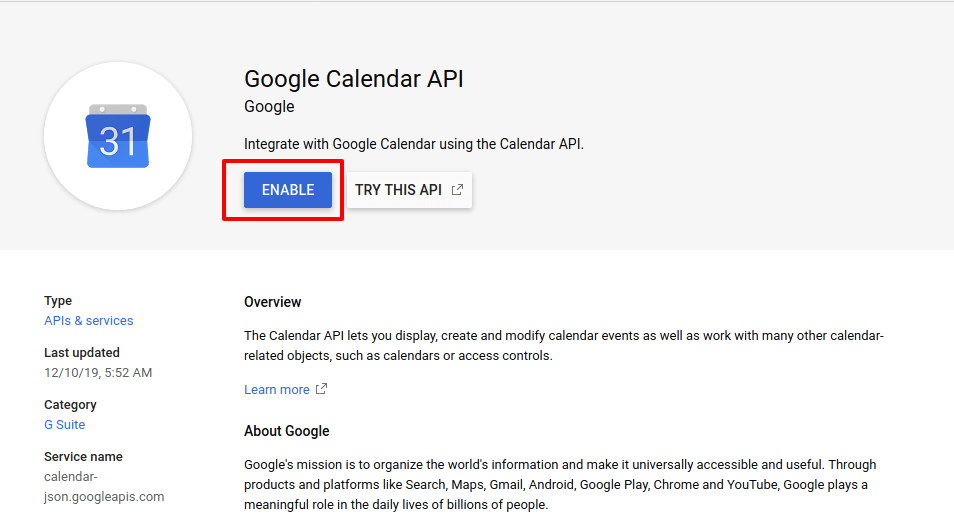
Search for the Calendar API on the next screen.
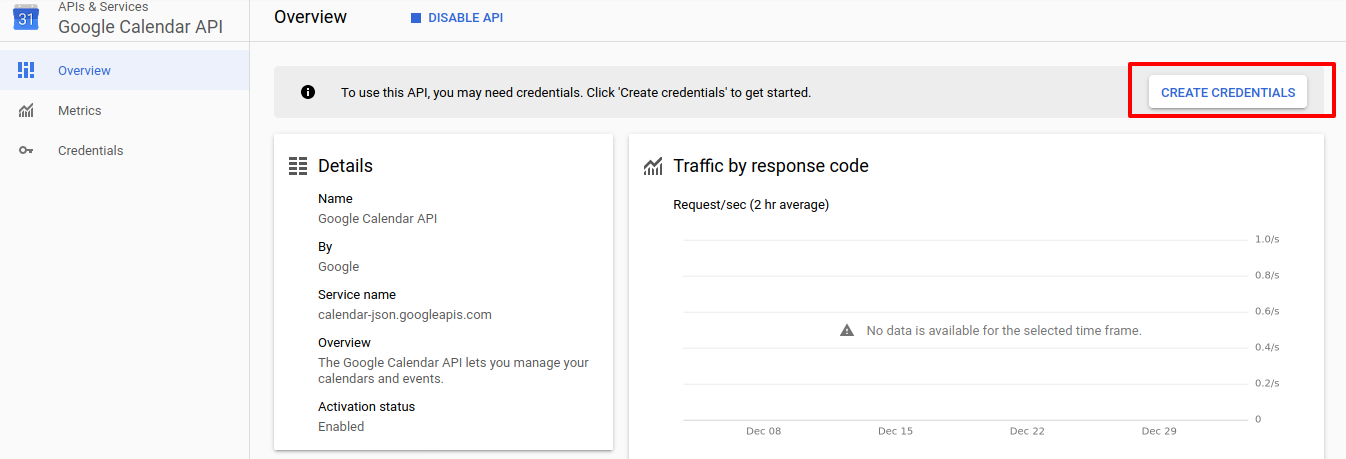
Now to get the Client ID and Client Secret click on create credentials.
Select Google Calendar API, Web browser, user data and then click on “What credentials do I need”.
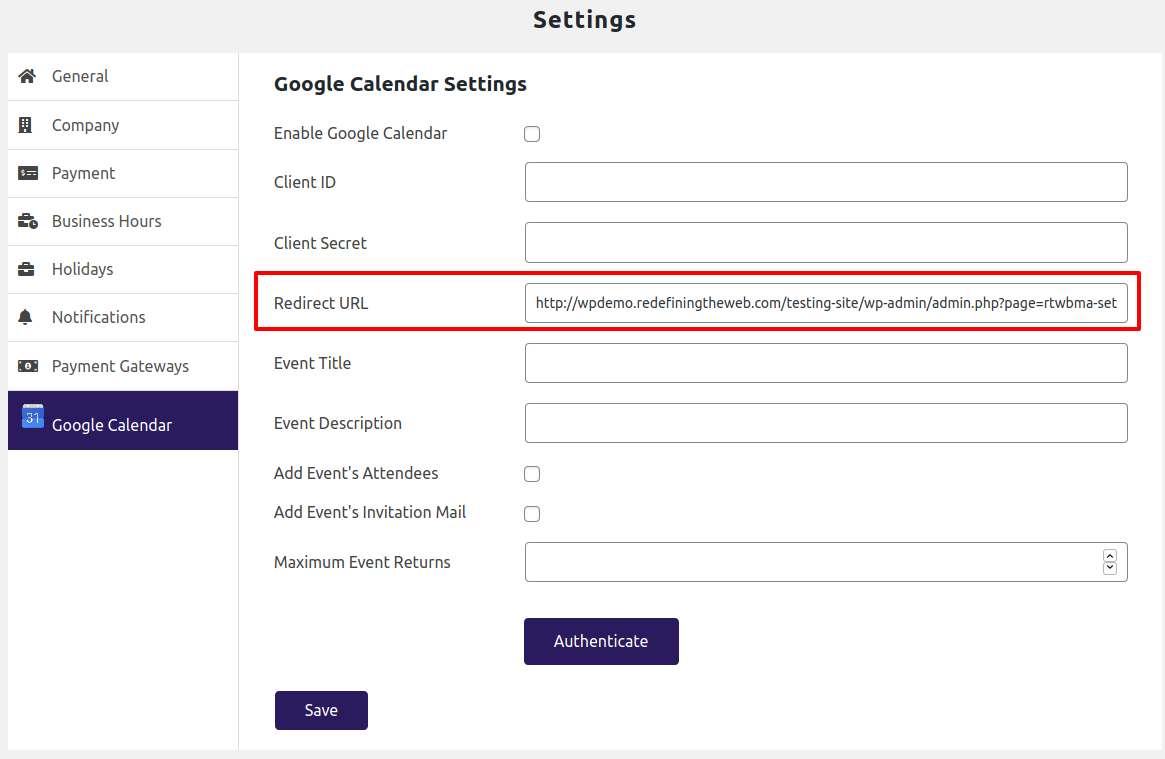
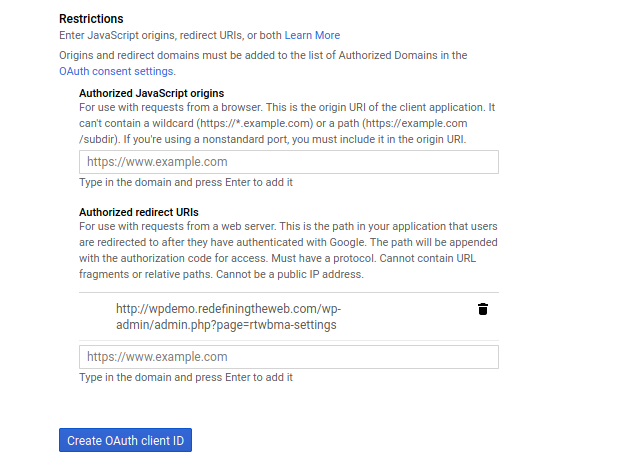
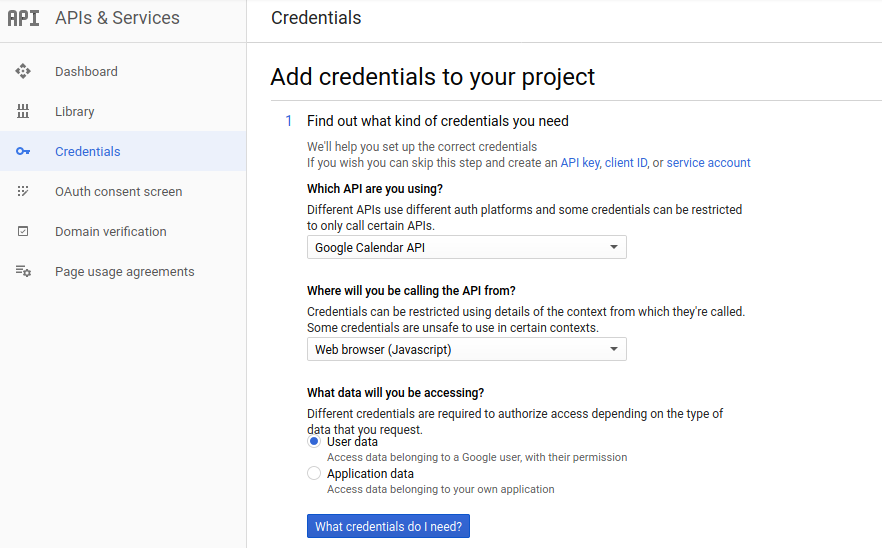 Enter the redirect URL from the Google Calendar Setting page of our plugin.
Now copy and paste “Client ID” and “Client Secret” into related fields in “Google Calendar Settings” of our plugin.
