Basic Settings

- Show Page Title – Displays the page title in the PDF.
- Show Page Name – Displays page names on each page, this setting the use of page break field of gravity form.
- Show Page Number – To display the page number in the PDF.
- Show Empty Fields – Show or hide the empty form fields
- Select Background Color – Choose the color which you want for the PDF background
- Select Background Image – Add wallpaper to your PDF.
- RTL Support – Generates PDF from right to left basically for the languages like Arabic or which start from right align.
- Generated PDF – You can either download your PDF or send it via email or choose both.
- Upload Button Image – You can customize the PDF download button by adding logo of PDF or any other image to make it more attractive.
- Image Button Width – Give the width of the image button by default it is 100.
- Image Button Height – Give the height of the image button by default it is 60.
- Enable PDF Security – Check this option you want to protect your PDF with password (choose the password which you want for your generated PDF for both admin and user).
PDF Header Settings
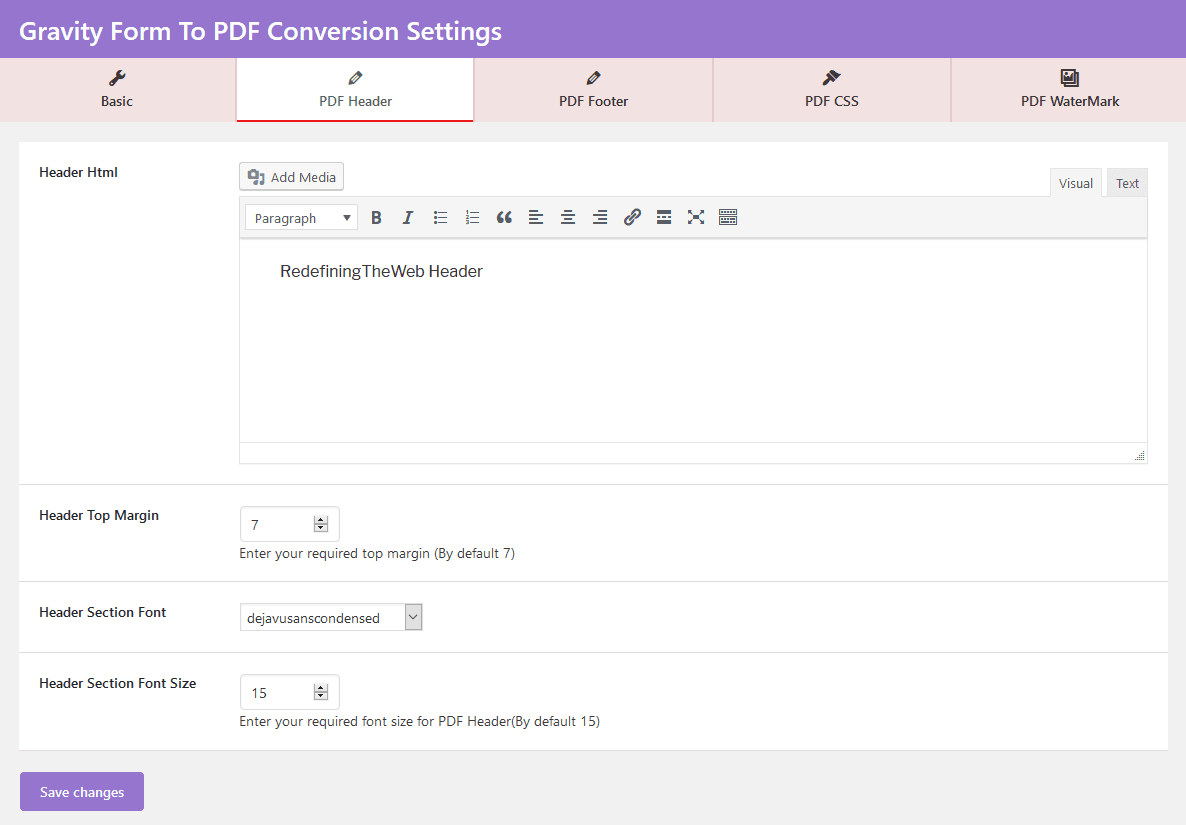
- Header HTML – Enter the string which you want to show in your PDF.
- Header Top Margin – Puts margin in your PDF form top (by default it is 7).
- Header Section Font – Select among 40 fonts for your header HTML.
- Header Section Font Size – Gives size to your header text (by default it is 15).
PDF Footer Settings
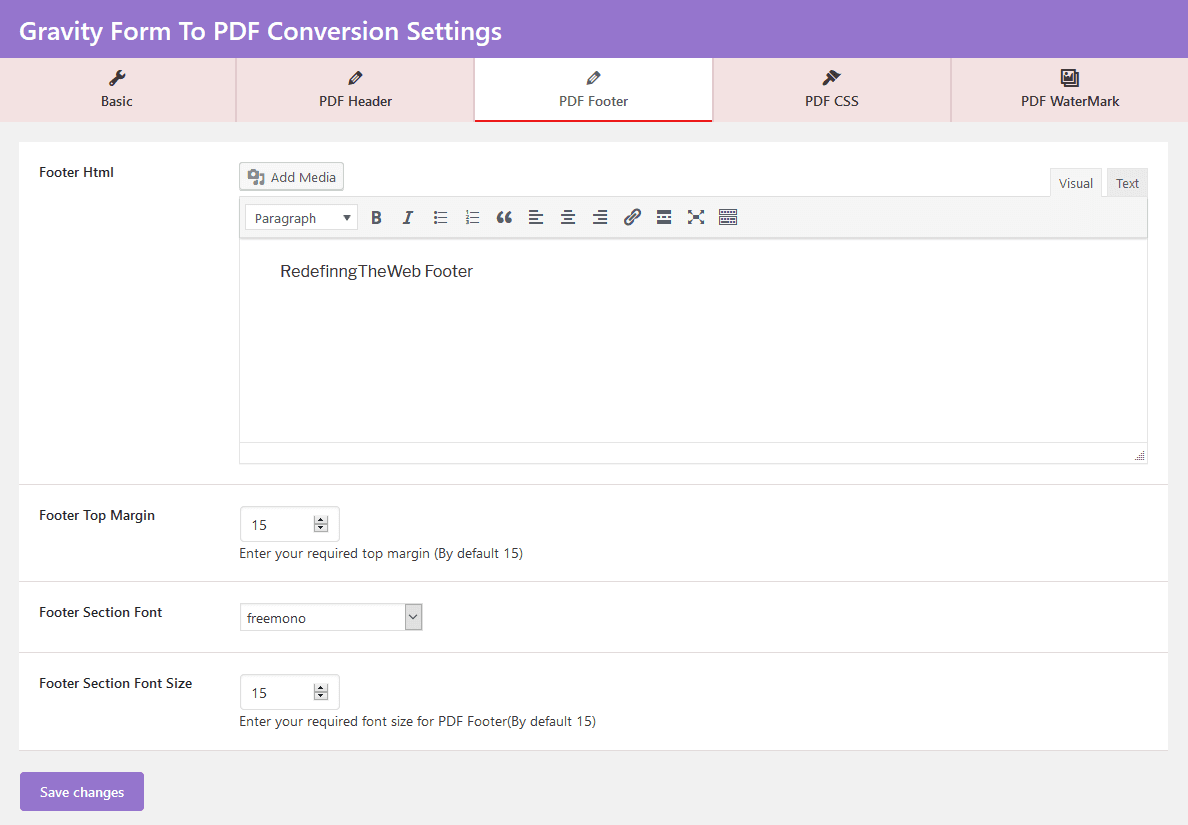
- Footer HTML – Enter the string which you want to show in your PDF.
- Footer Top Margin – Puts margin in your PDF form top (by default it is 7).
- Footer Section Font – Select among 40 fonts for your footer HTML.
- Footer Section Font Size – Gives size to your footer text (by default it is 15).
PDF CSS Settings

- PDF Page Size – Select among 266-page sizes.
- PDF Page Orientation – Select the page orientation either portrait or landscape.
- Body Top Margin – Enter your required top margin for the main PDF body (By default 37). A minimum 37 required otherwise it will not work.
- Body Left Margin – Give left margin to your PDF body (by default it is 15).
- Body Right Margin – Give the right margin to your PDF body (by default it is 15).
- Body Font Family – Select among 40 fonts for your PDF body content.
- Body Font Size – Gives size to your PDF body text (by default it is 15).
- PDF Custom CSS – Give Custom CSS to your PDF body Content
PDF Watermark Settings
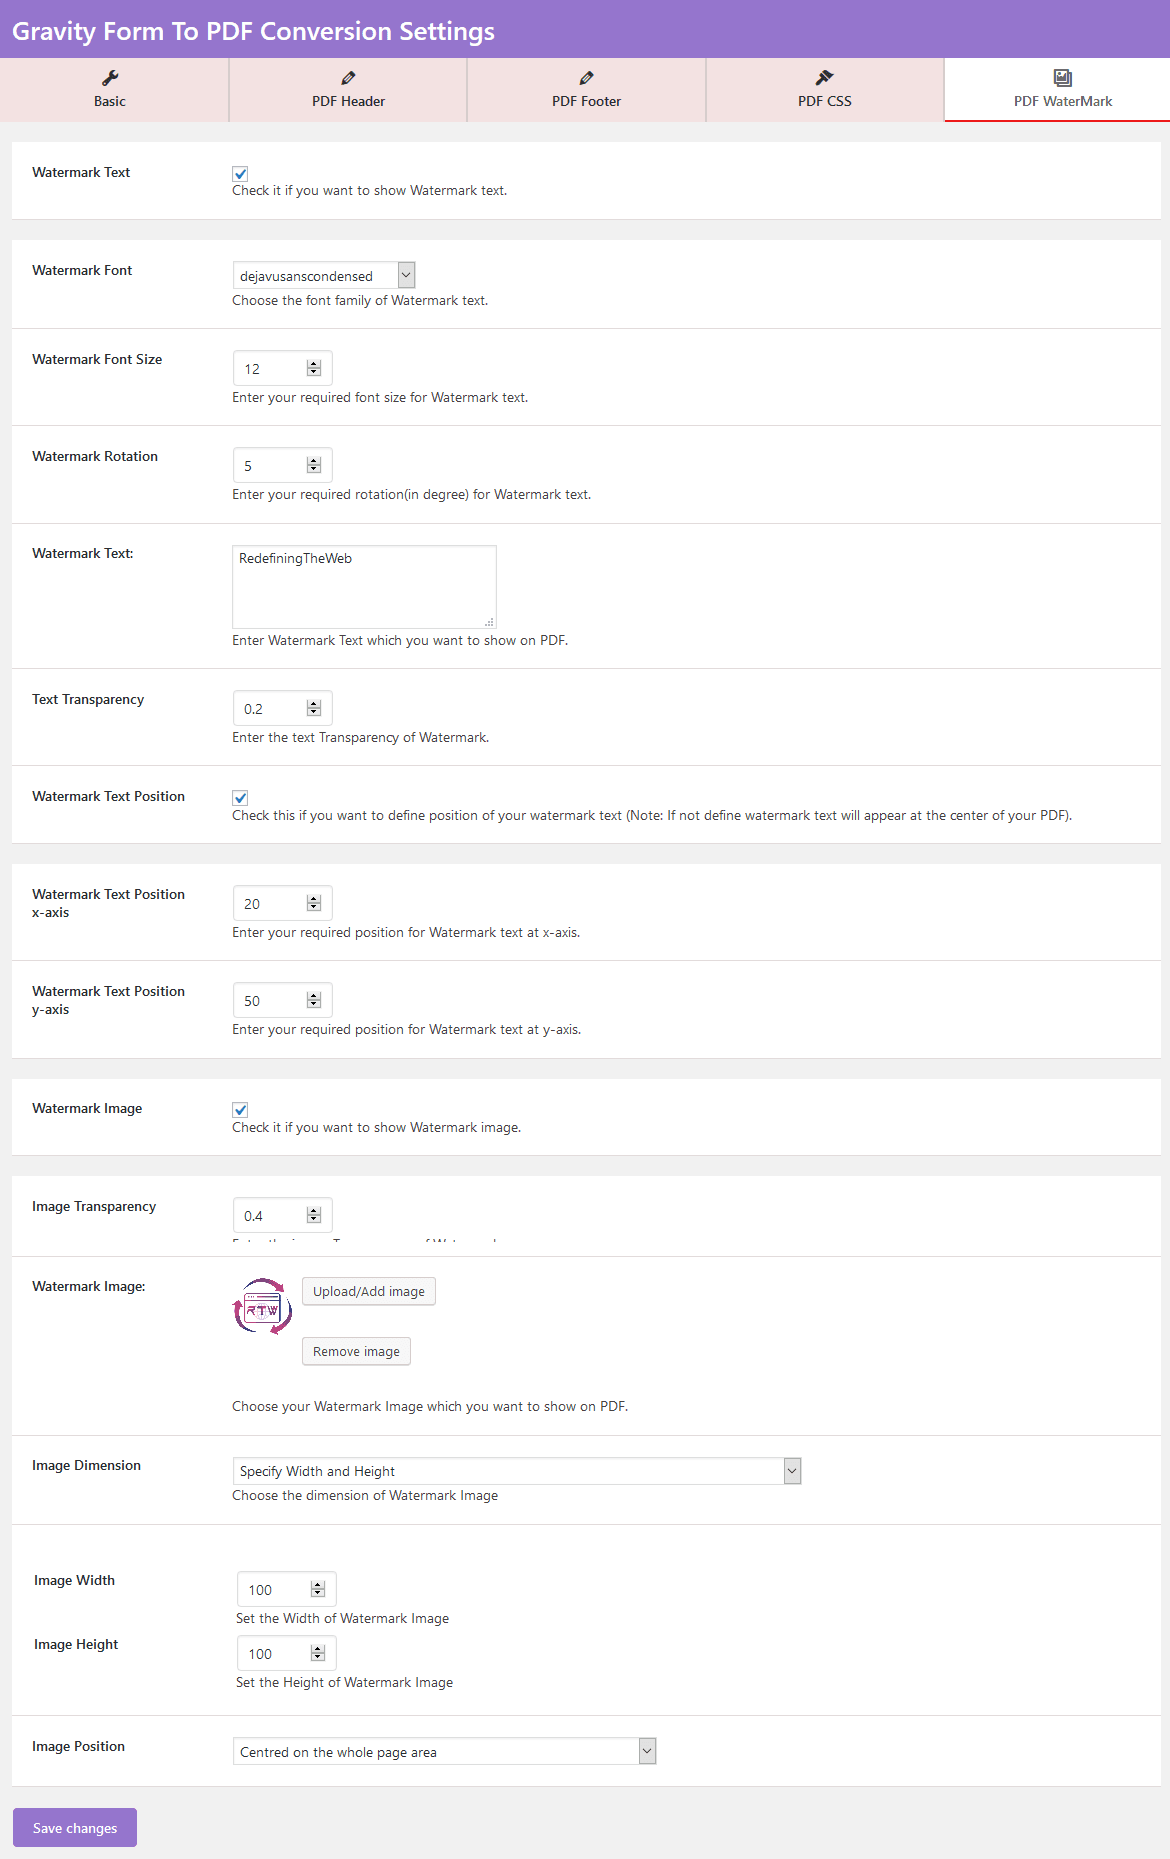
- Watermark Text – Select this setting to enable text watermark. On selecting this the following text watermark setting appears.
- Watermark Image – Select this setting to enable image watermark. On selecting this the following image watermark setting appears.
- Watermark Font – Select among 40 fonts for your PDF watermark text.
- Watermark Font Size- Enter font size for your watermark text as required.
- Watermark Rotation – Enter the angle at which your watermark text will rotate.
- Watermark Text – Enter Watermark Text which you want to show on PDF.
- Text Transparency – Enter the required transparency for the watermark text.
- Watermark Text Position – Select this if you want to position your watermark text anywhere in your PDF except at the center.
- Image Transparency – Give your required transparency to the watermark image.
- Watermark Image – Set image as a watermark in your PDF. This feature makes the PDF attractive.
- Image Dimension – Choose dimension for your PDF watermark image.
- Image Position – Position your watermark image where you want.
Google Spreadsheet Integration

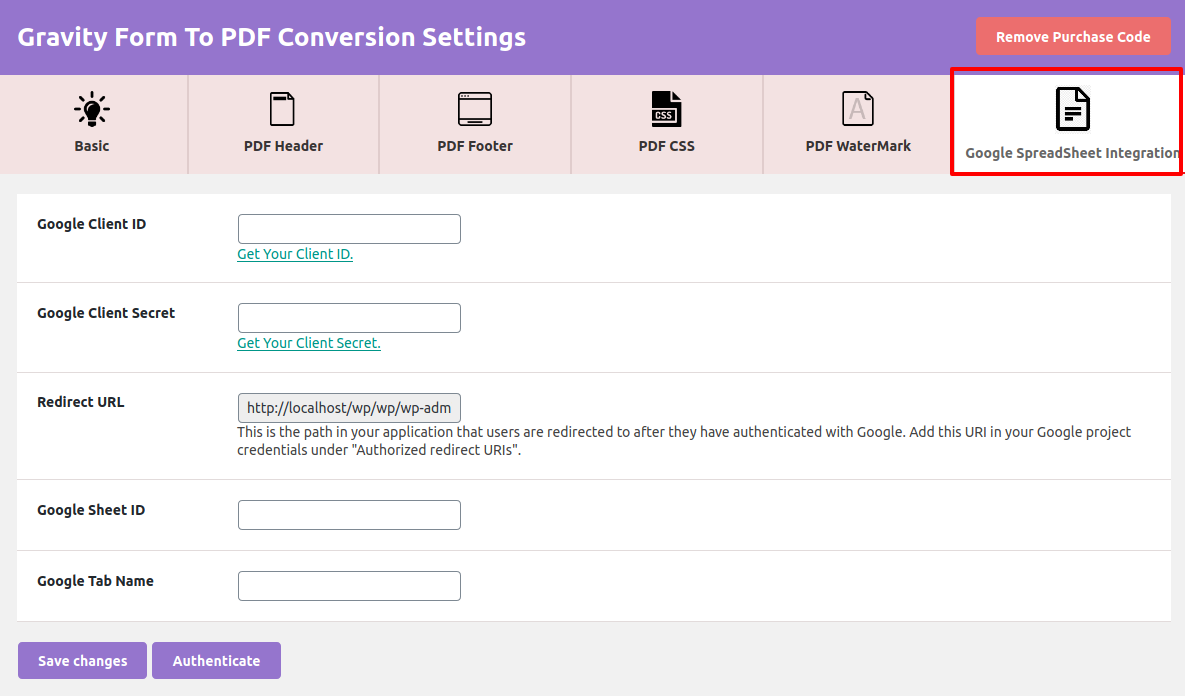
As the field name suggests, the admin has to enter Google client id and Google client secret to integrate with google spreadsheet. Enter these values and click on the authenticate button, when it is verified successfully enter the value in the last two fields ie, Google Sheet ID and Google Tab Name and then click on the Save changes button.
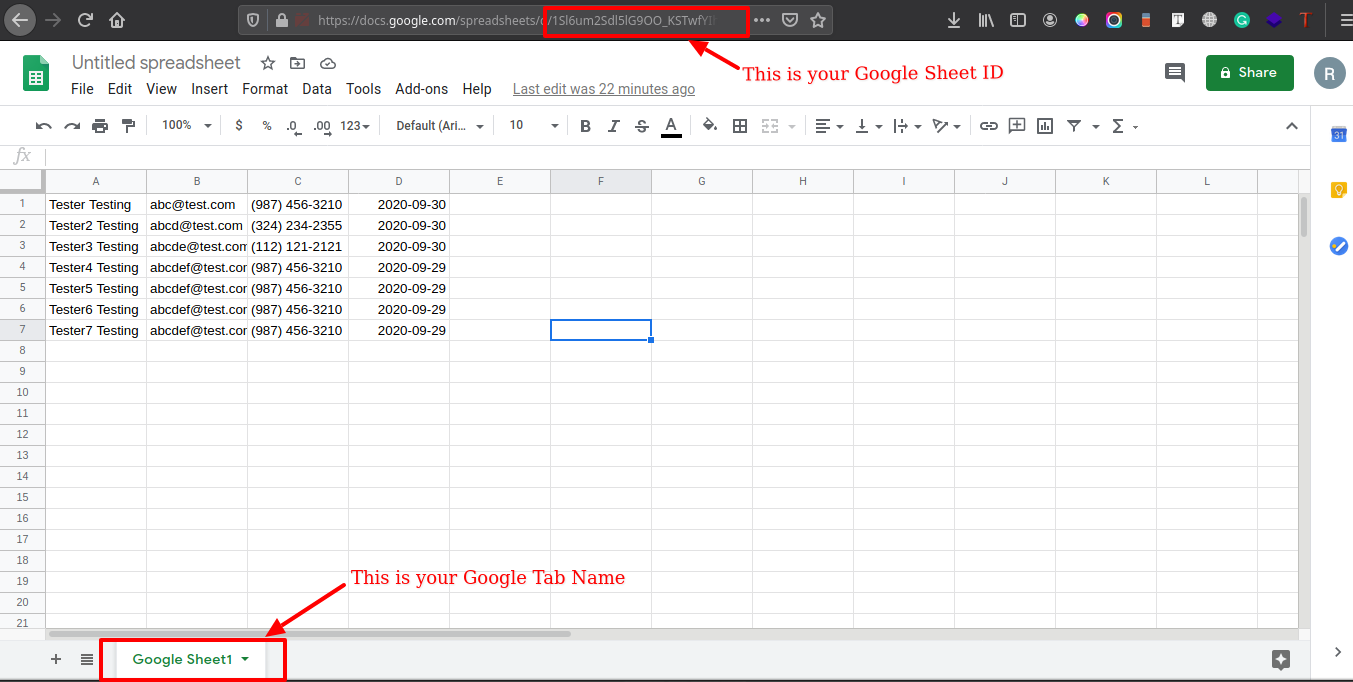
You can find the last two values from the Google Sheet tab while creating a new one as shown in the image below.
And you can see the entries as follows.
PDF Format Setting

These two templates (i.e. Focus Fields & Focus Gravity) enhances the design and layout of the PDF. Admin can select among both of these templates or he may write his own CSS for the PDF. He can also change the field’s background color of the PDF to be created.
This setting is in the gravity form setting section. Put the value shown in the red circle into the editor to get the values of fields that you have created and in the required format.
Note – This format is for the PDF.
Generate Bulk PDF
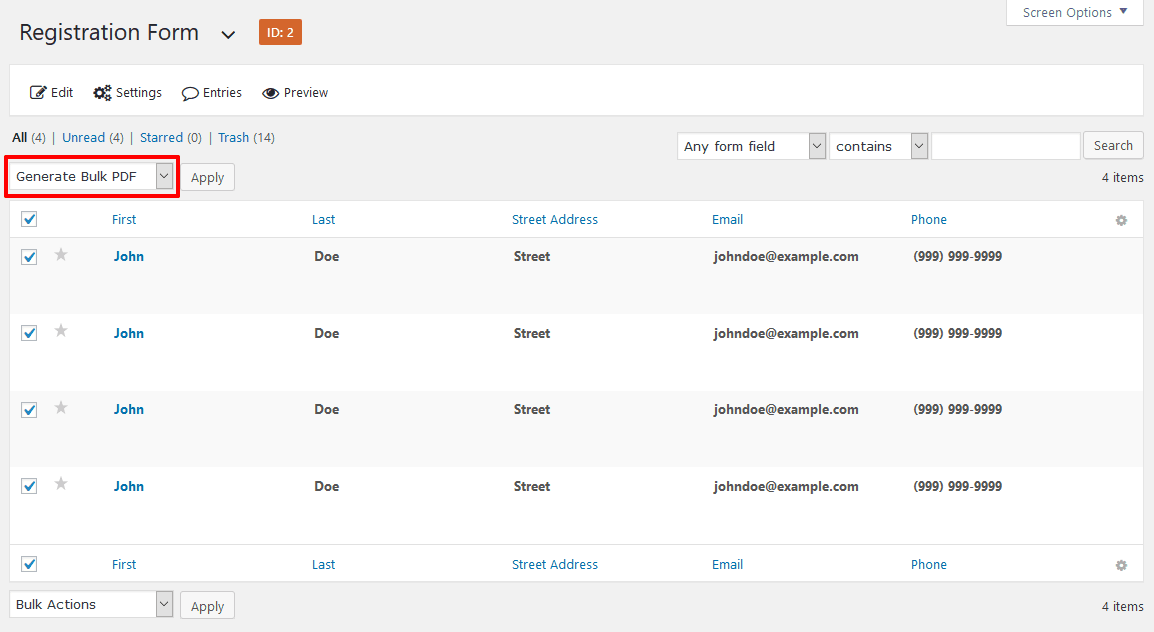
Generate Bulk PDF setting is in the entries page of gravity form which provides the facility to the Admin that he can generate all entries PDF at a time.
Note – If the PDF is secured with a password admin can open it by using his password which he saved in the basic settings of Admin Password.
Generate Excel
Now admin can create an excel file of all entries in his form at a single click. In the bulk action setting of the Gravity Forms entries page a new feature “Create Excel” was added in our latest version which helps the admin in creating excel of all gravity form entries.
Create CSV
Now admin can get a CSV file of Gravity Forms Entries. A new feature “Create CSV” is added in the bulk option setting of the Gravity Forms Entries Page which helps admin to create CSV of all Entries.
